

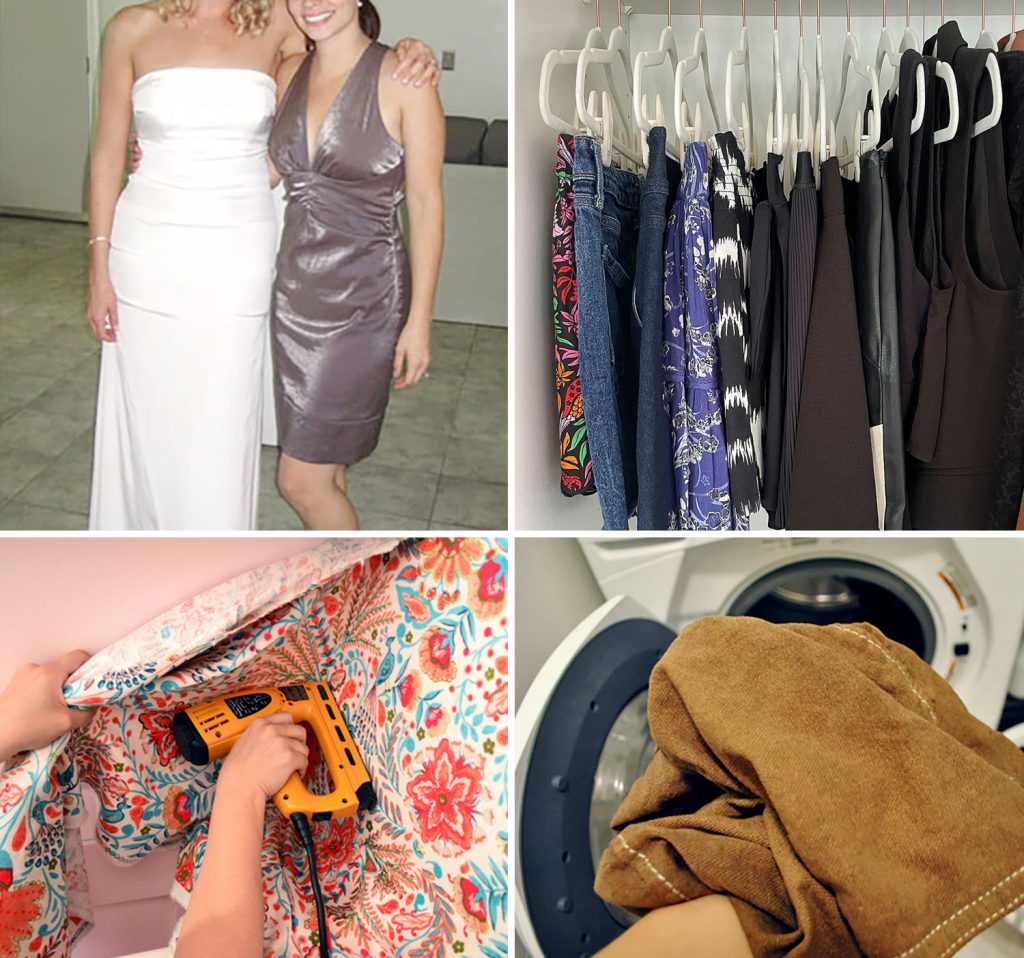
Dyeing your garments can sound troublesome, messy, and downright scary. However guess what? It’s none of these issues! In spite of everything, I’m the woman who dyed her marriage ceremony gown so I may put on it once more. Belief me, anybody can dye garments at residence as a result of it’s simple, simple, and loopy inexpensive. And it’s a good way to make stuff you simply aren’t carrying much more wearable as a substitute of simply giving up on them. Or giving them closet area however by no means reaching for them as a result of the colour simply isn’t your favourite.
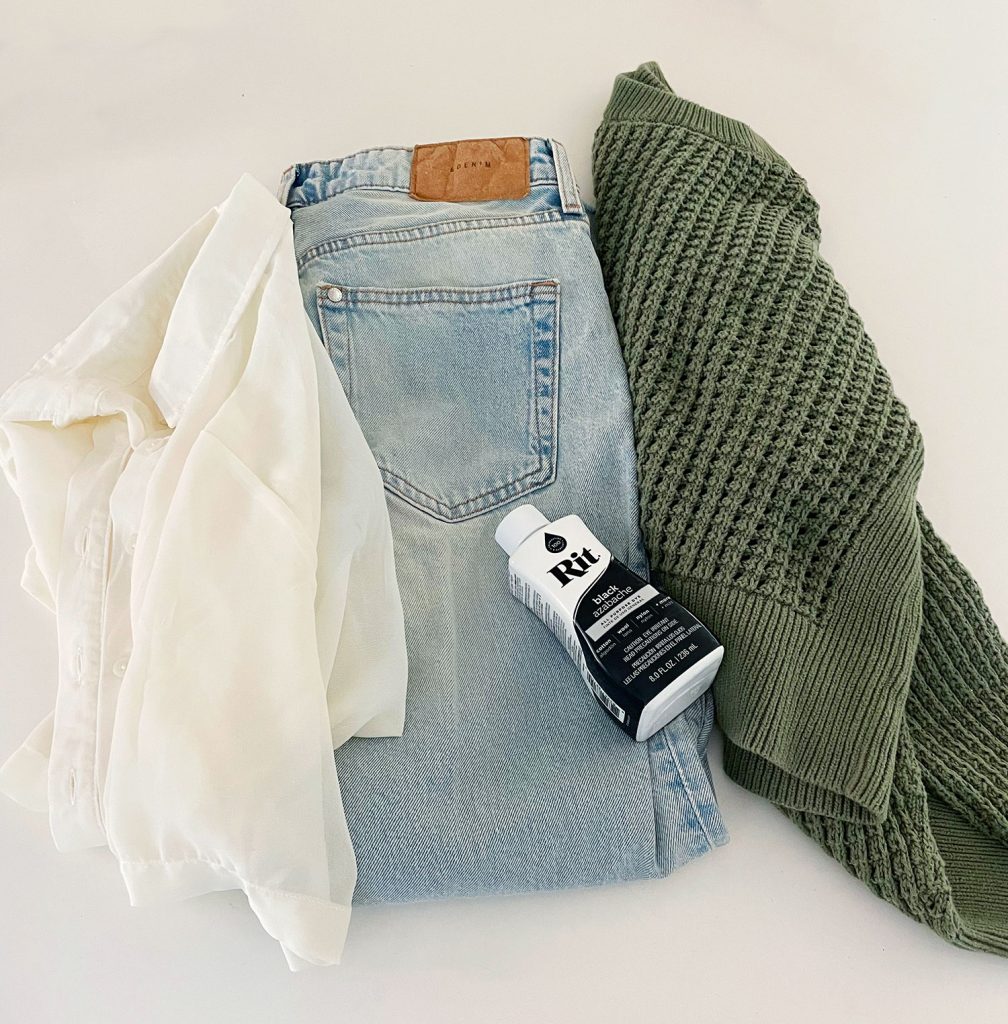
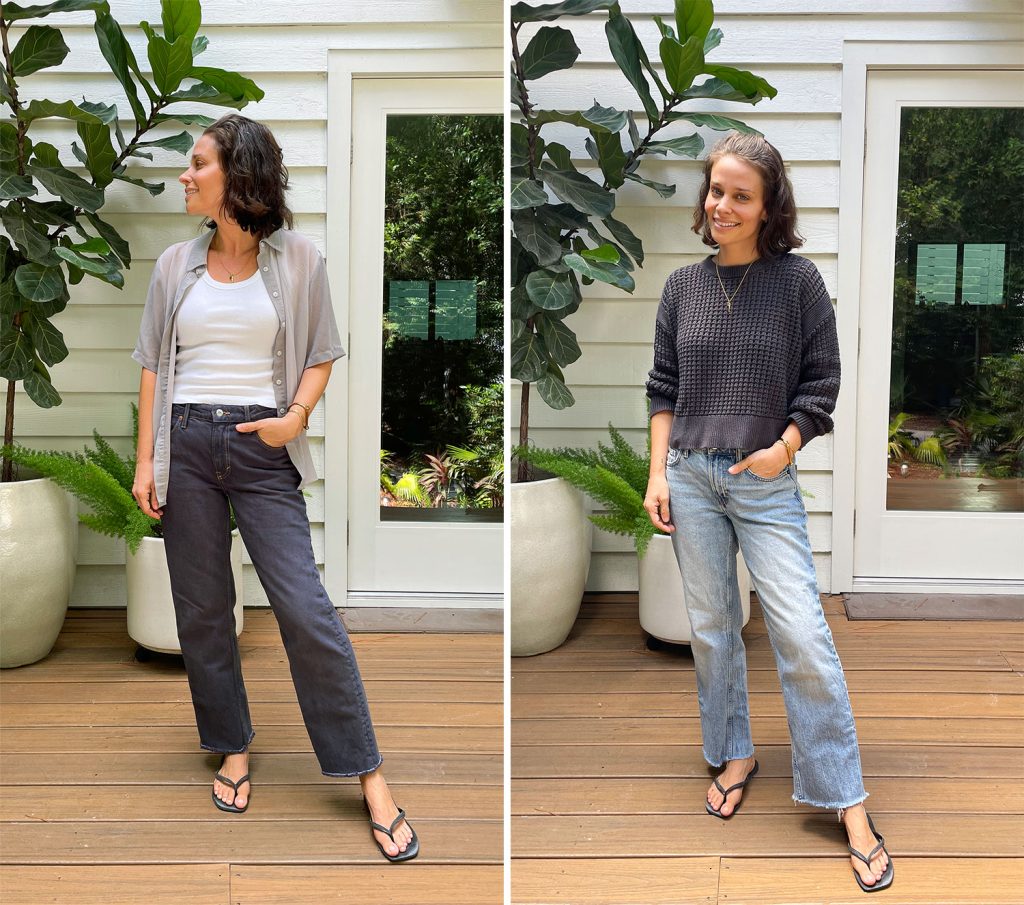
Dyeing materials is nice technique to customise, alter, or reinvigorate your garments with a brand new hue. I wasn’t actually carrying this shirt, denims, or sweater a lot, so I used to be on the verge of eliminating them. The white shirt and denims had a weirdly yellowed tint that made them look a bit soiled – and the inexperienced sweater was previous & pale. Then I noticed I may dye them my favourite colour (duh… black!) and so they’d be simpler to include into my wardrobe. So in the long run, I acquired 3 “new” items of clothes from one $4 bottle of dye!

Observe: This publish isn’t sponsored by Rit. It’s only a dye that’s extraordinarily simple to search out (they even have it in our grocery retailer!). We’ve used different manufacturers with equal success prior to now.
My Finest Garments Dyeing Recommendation
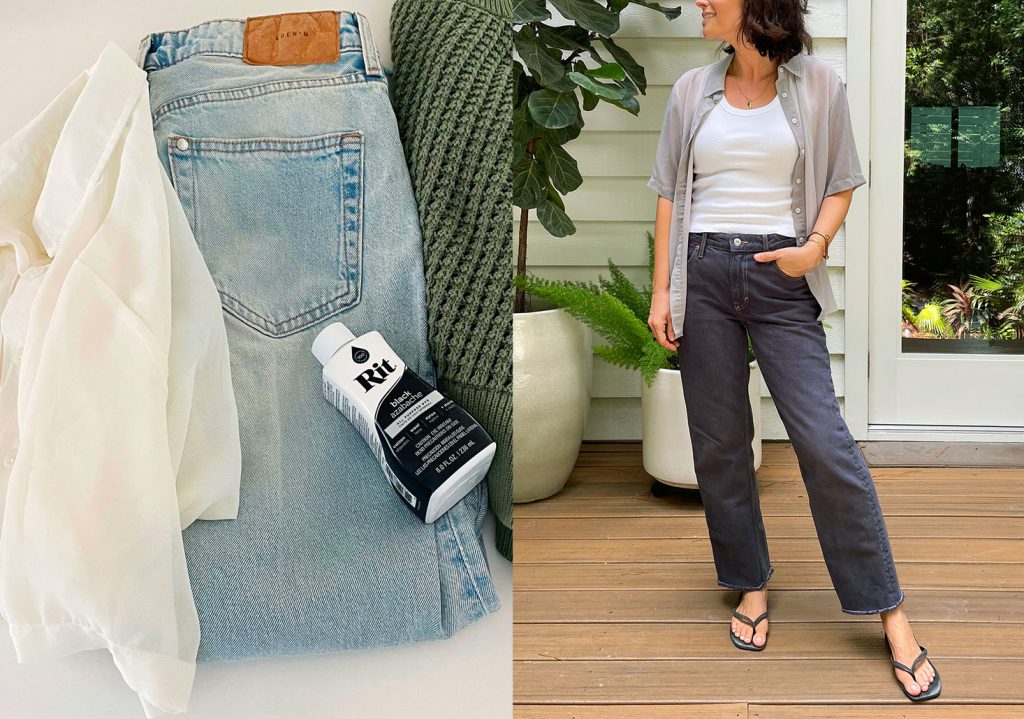
The #1 factor I inform individuals nervous about dyeing their garments is to keep open-minded in regards to the end result. Attaining a exact colour is troublesome, even for professionals. That’s as a result of MANY components affect the result: the material mix, the merchandise’s unique colour, your dye focus, the time soaking, and many others. So this course of is extra about shifting garments in direction of a colour (darker, greener, pinker, and many others) than hitting a precise colour goal. For instance, black dye turned my button-down and denims beneath darker and nearer to black, however neither one is a real deep black. The excellent news is I additionally love grey and it eradicated the yellow tint they each had. So in the end I just like the end result much more than earlier than!
Personally, I feel that’s a part of the enjoyable of this DIY venture. You by no means know precisely how issues are going to prove! And with these garments (and with my marriage ceremony gown) any consequence can be an enchancment over the present variations that weren’t getting worn.
Provides Wanted To Dye Garments
Listed here are the supplies it is best to collect earlier than dyeing materials. We like to make use of the “bucket technique” (it may also be finished in a sink or tub). If you’re dyeing bigger objects like bedding or curtains, you can even use your washer.

- 1 bottle of Rit All-Objective Liquid Dye
- 5-gallon bucket (we discovered it useful to have 2)
- Boiling water
- 1 cup of salt (for materials with cotton, rayon, ramie, or linen)
- 1 cup of white vinegar (for materials with nylon, silk, or wool)
- 1 teaspoon of gentle dish cleaning soap
- Giant stick or spoon to stir with
- Rubber gloves
- Hose or bathe sprayer to rinse
- Washer
We selected to work exterior so we didn’t have to fret about spills or splashes. If you’re working inside, it’s finest to guard your work space with a dropcloth, plastic tablecloth, or towels. The dye doesn’t are inclined to stain if wiped up rapidly, nevertheless it’s at all times finest to cowl your work floor simply in case.
Rubber gloves are additionally really helpful to stop potential pores and skin discoloration from the dye.
What Materials Can I Dye?
Rit All-Objective Dye is nice on a variety of materials, particularly pure fibers like cotton, wool, linen, ramie, and silk. It additionally works on synthetics like nylon and rayon. For materials containing greater than 35% polyester, acrylic, or acetate, Rit recommends their Artificial Materials Dye. You can’t use the bucket technique with that dye (it have to be finished on a stovetop). So examine your clothes tags earlier than starting to make sure you’re utilizing the right product and technique.
Step-by-Step Directions
The entire course of took about an hour (minus washing time within the washer), so seize your provides, cowl your work space, and let’s get began. Right here’s an outline of the steps.
- Pre-Wash Your Garments
- Put together The Dye Answer
- Add Clothes
- Stir
- Rinse Totally
- Wash Once more
1. Pre-Wash Your Garments
Materials have to be clear and freed from stains earlier than dyeing. Ship every thing by way of the washer earlier than you start, and deal with any stains. Don’t use cloth softener, since that may intrude with dye absorption.
The material additionally wants to stay moist, so skip the dryer. In case your garments are already dry, soak them earlier than starting. That is the place our 2nd bucket got here in helpful!
2. Put together The Dye Bathtub
Combine your answer in a container sufficiently big in your garments to maneuver freely. This is usually a sink, bathtub, bucket, or bowl. We selected to work exterior this time, however we generally put a bucket or bowl in the sink or bathtub.
To organize your dye answer:
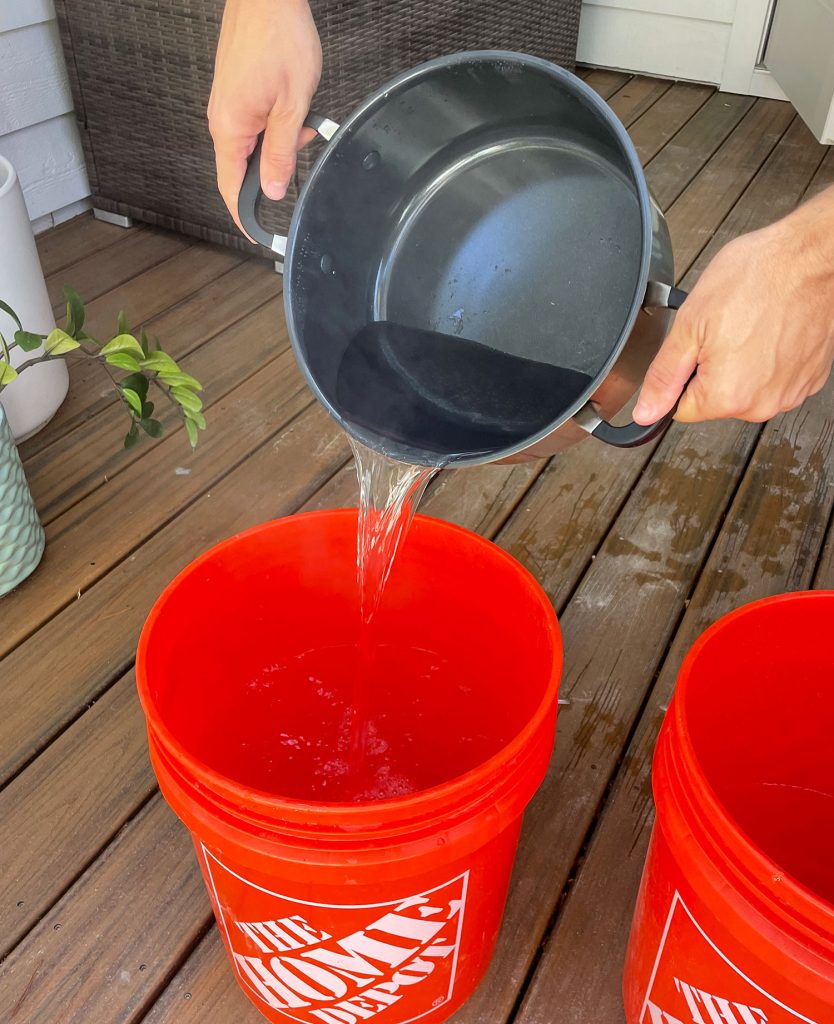
Begin with scorching water
Rit recommends 3 gallons for each 1 pound of cloth. Water ought to be scorching, ideally a minimal of 140º. We used a mixture of scorching faucet water and a pair of pots of boiling water. We used a kitchen thermometer to examine, however precision isn’t essential. Depart room in your materials to be added, so don’t overfill the container.
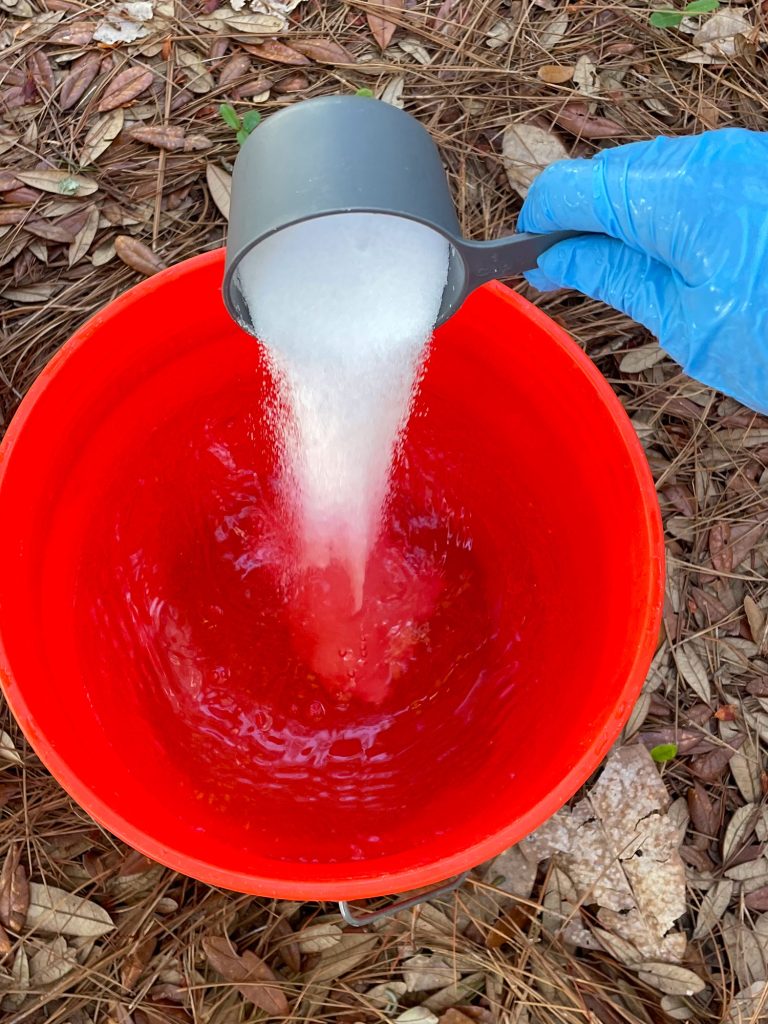
Add salt or vinegar
Use a measuring cup so as to add 1 cup of desk salt (for cotton, rayon, ramie, or linen) and/or 1 cup of vinegar (for nylon, silk, or wool). These will assist improve the colour.
Add dish cleaning soap
Subsequent, add 1 tsp of gentle dish cleaning soap to your answer. It will promote even dyeing throughout your cloth.
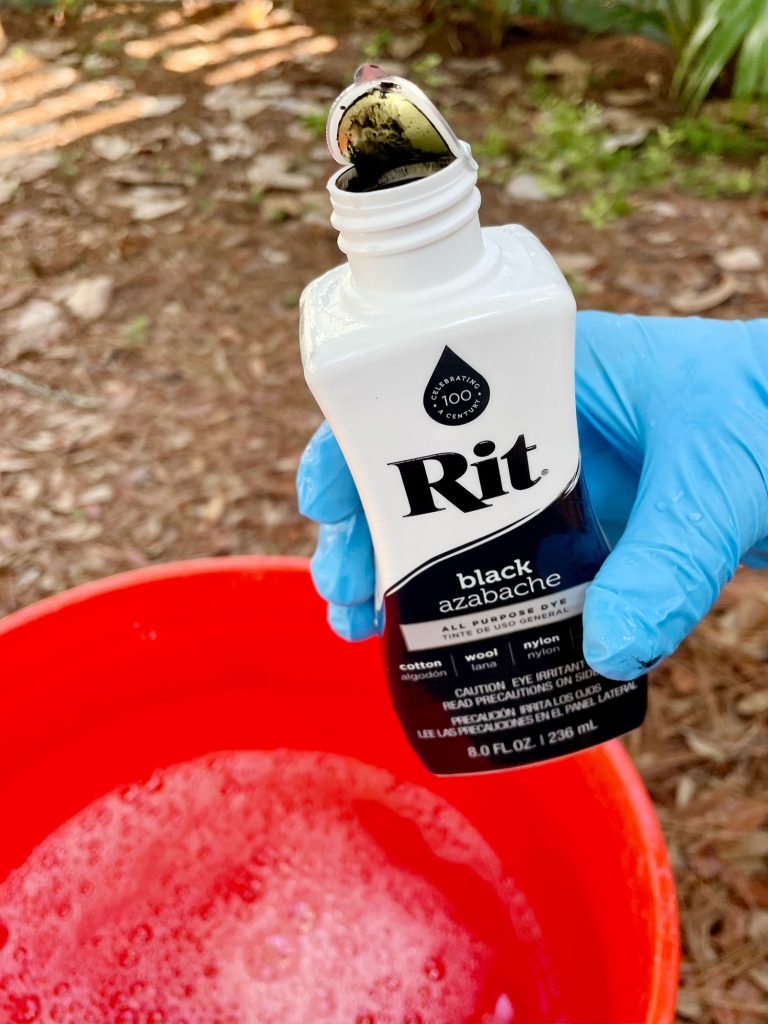
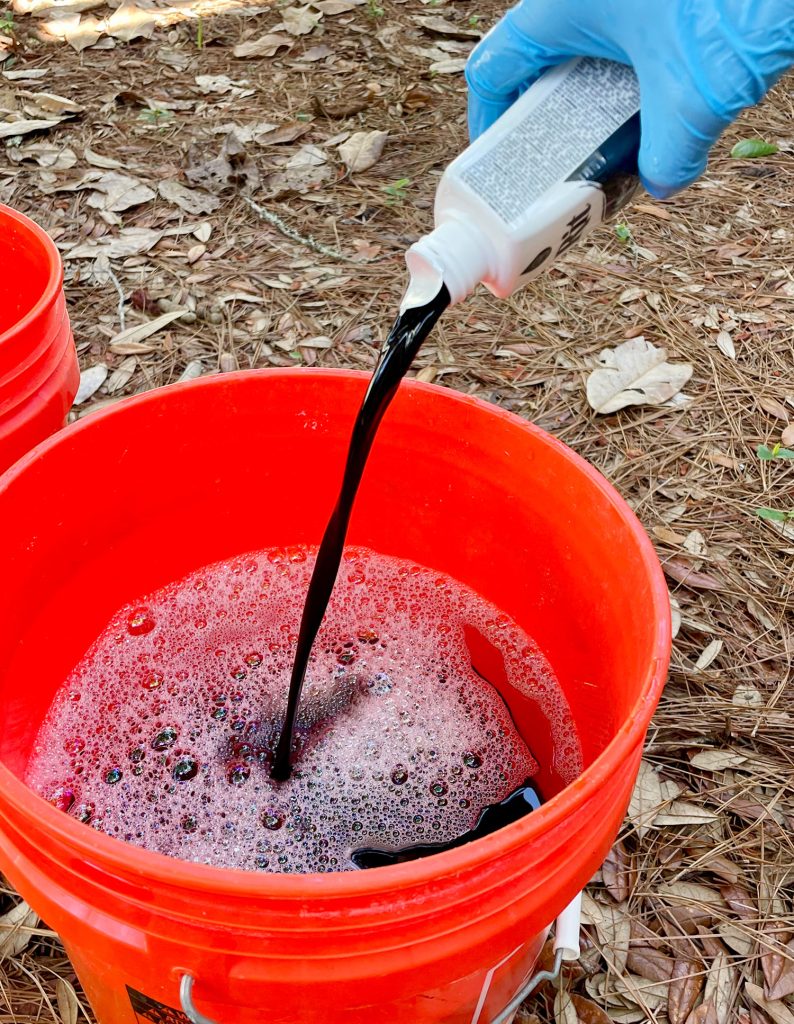
Add liquid dye
Now, add your Rit Dye to the water. Rit recommends 1/2 bottle for each 1 lb of cloth. Nonetheless, extra may be added to realize a bolder or extra saturated colour. We used an entire bottle. Combine your elements properly.
Observe: Rit additionally sells concentrated powder dye. It’s solely a greenback cheaper ($2.50 vs $3.50) however solely goes half so far as the liquid, so we normally go for the better, pre-mixed liquid model.
In case you’d like, you may check your colour by dipping a paper towel into the combination. This isn’t exact, however it’s a fast technique to see if it is advisable to add extra dye or dilute with extra water. That is useful if you happen to’ve mixed a number of dye colours to make a customized colour.
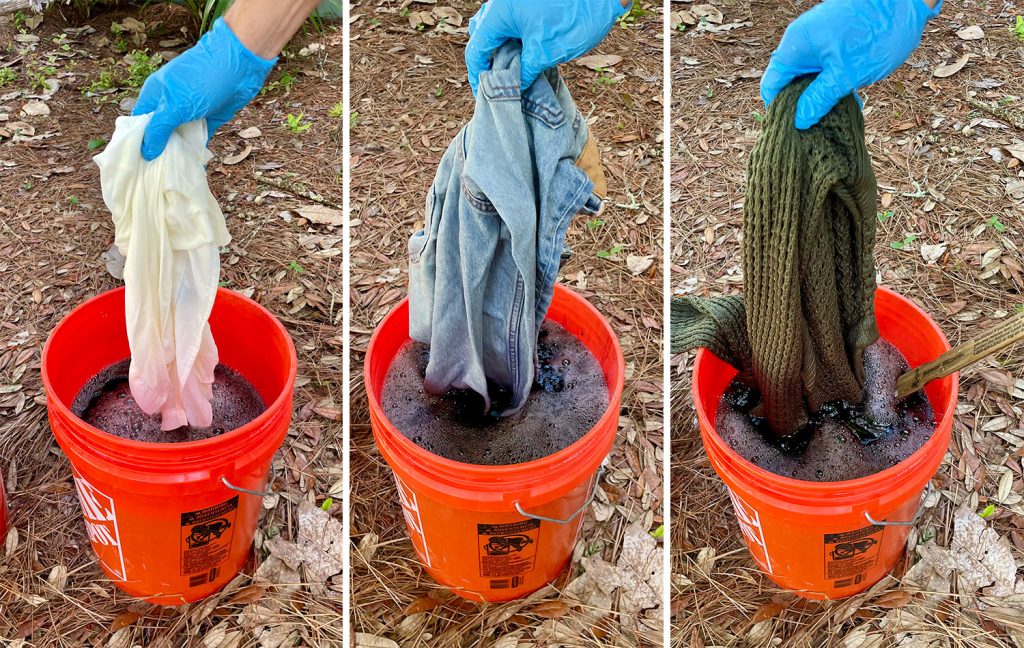
3. Add Clothes
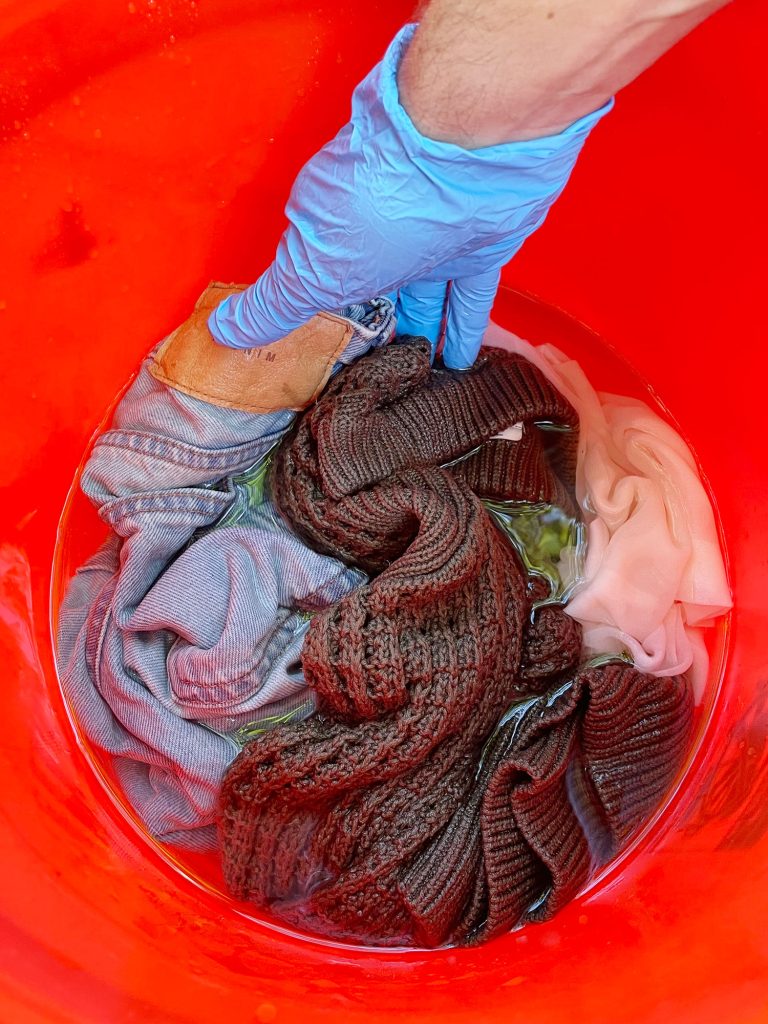
Wring out your garments by hand so they’re moist, however not dripping. Add materials to the dye tub and use your stir stick to make sure they’re absolutely submerged. We dyed all 3 items of clothes collectively.
4. Stir, Stir, Stir
Sluggish and steady stirring helps obtain an excellent and constant colour throughout your cloth. At a minimal, stir repeatedly for the primary 10 minutes. You’ll be able to proceed this course of for as much as an hour. Some materials (like nylon) want much less time, whereas others (polyester) want extra. We did this batch for half-hour, stirring slowly and repeatedly the complete time.
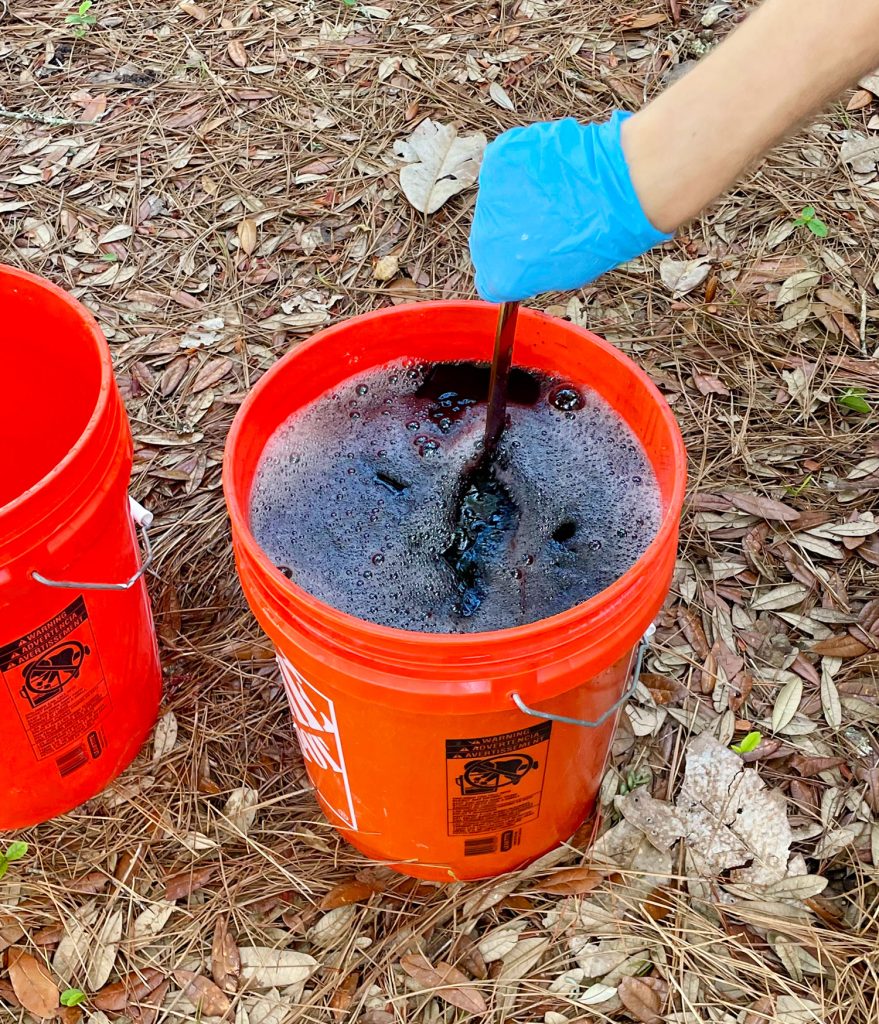
John did this half whereas I photographed the method and introduced numerous issues to him as wanted (it’s good to have an additional set of arms however very doable to do that solo too – I’ve finished it absolutely alone earlier than). To remain entertained by the waiting-and-stirring stage this time, John watched Survivor on his telephone whereas I picked up one in all our children after college. The purpose I’m making right here is that this venture isn’t very rigorous. It’s typically fairly enjoyable. In case you’d like, you may periodically examine the colour throughout this ready interval. Simply do not forget that moist materials seem darker.
5. Rinse Totally
Put together a spot to rinse your clothes earlier than eradicating it from the dye tub. We used our spare bucket exterior to get many of the dye out after which moved inside to the bath for a extra cautious rinse. However first, we wrung out every clothes merchandise over the tub.
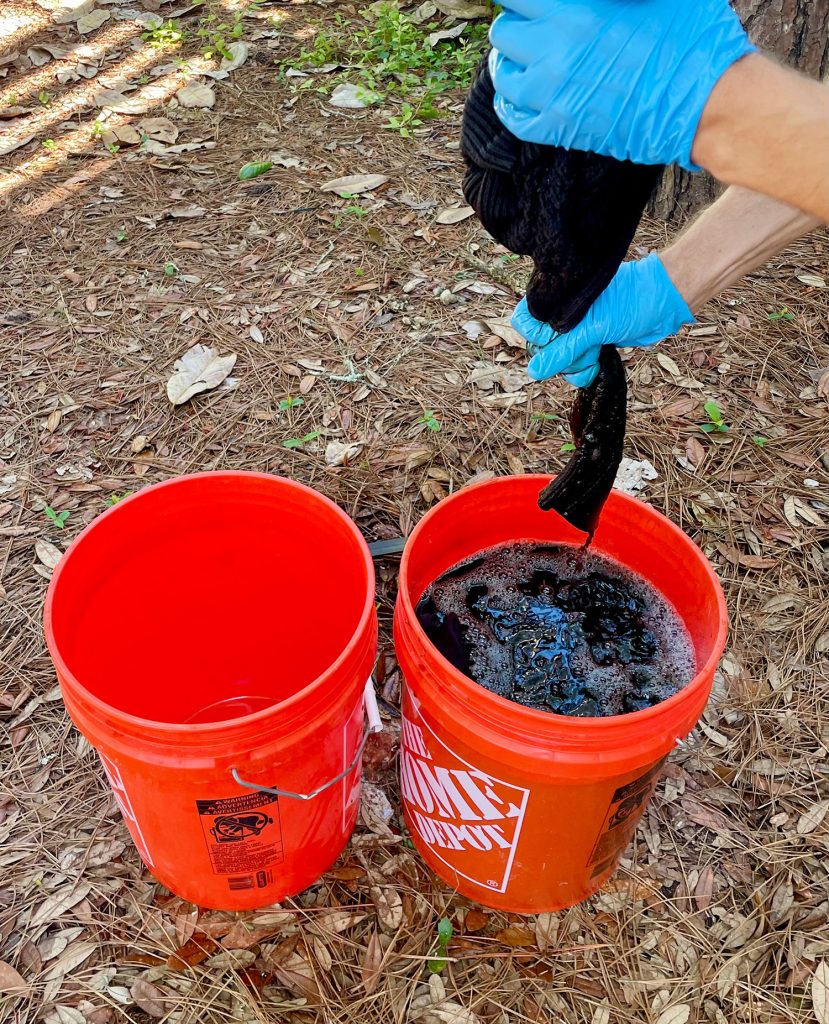
Then we used our backyard hose to spray off many of the extra dye. You’ll be able to already see how completely different materials reacted to the identical dye answer!
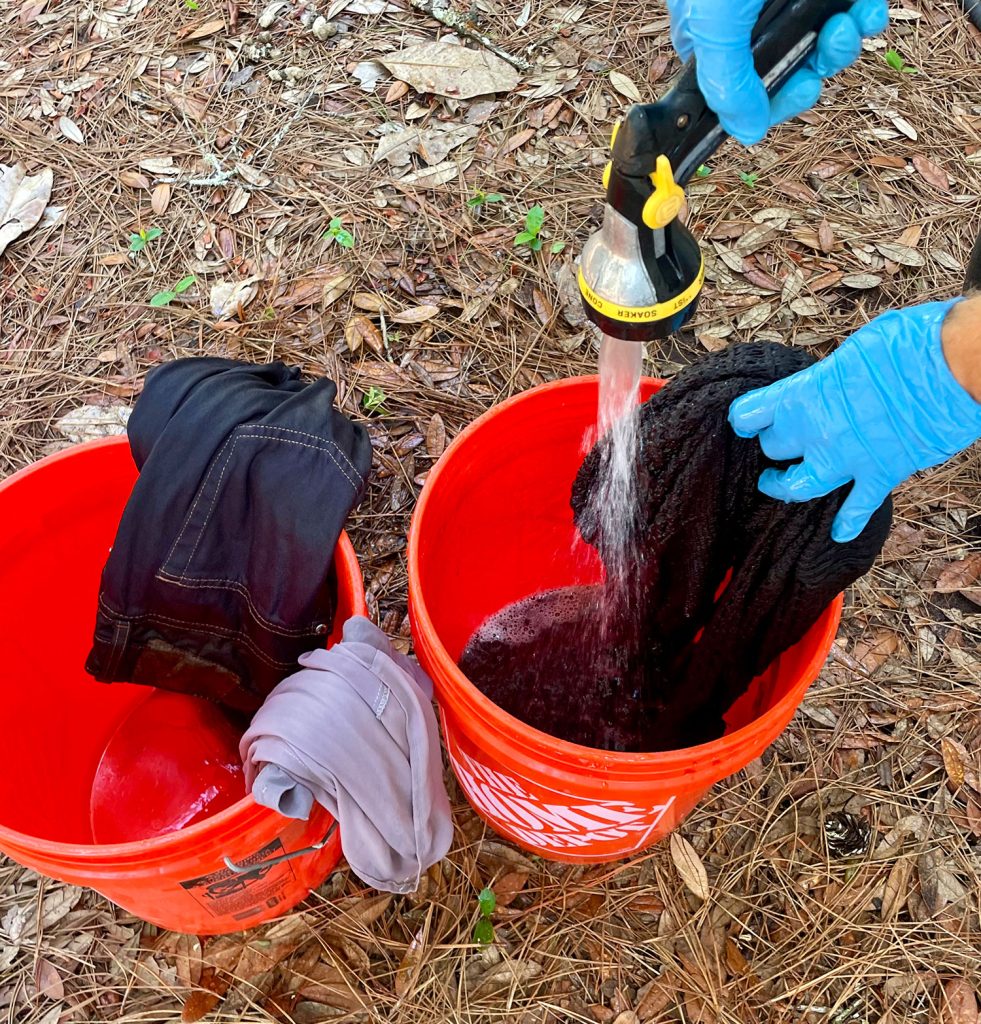
In the end you need to rinse your cloth till the water runs clear from the material. This takes time! We most likely spent 15 extra minutes inside rinsing with our bathe sprayer. Use cool water for this step.
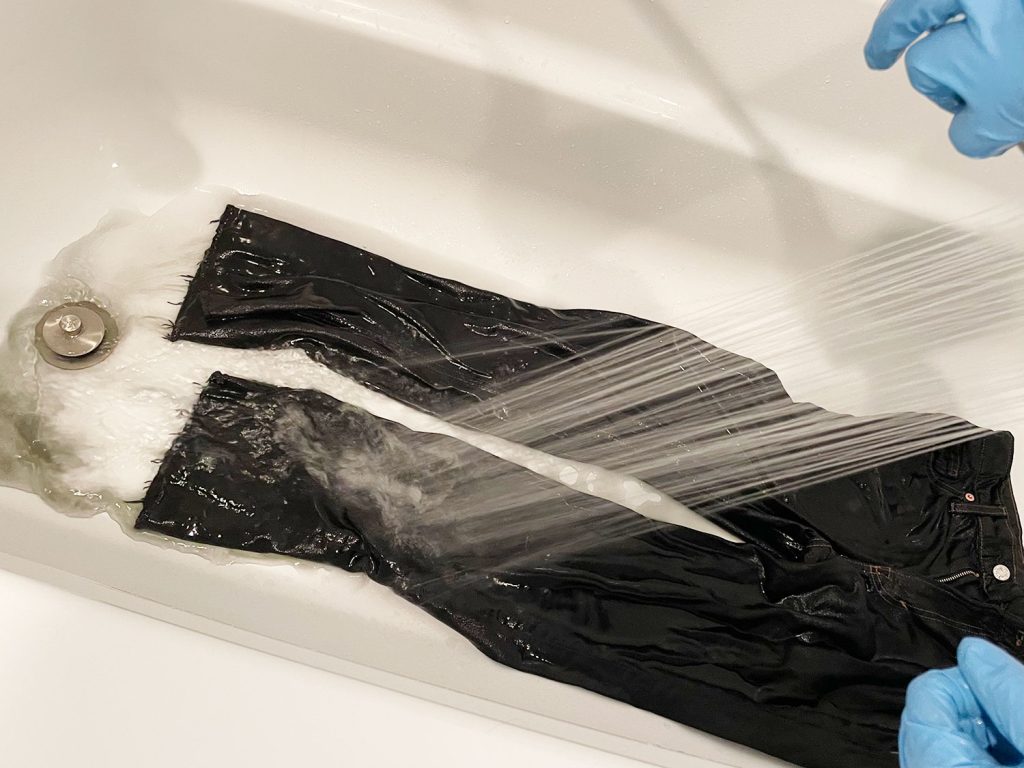
It’s not essential to rinse in two places. The white bathtub simply made it simpler to see if the water was clear.
6. Wash Once more
Lastly, wash all objects in your washer once more with heat water and gentle detergent. Throw in an previous towel together with your garments to behave as a “colour catcher.” This course of removes the remaining dye and assist to set the colour. Dry as regular in your dryer. We usually repeat this course of twice simply to be protected. In case your washer has an “further rinse” setting, it doesn’t harm to try this too. It will simply assist eradicate dye working throughout future, common washings. Observe: don’t skip the colour catcher towel. Ours catches SO MUCH COLOR.
The Remaining Consequence
Like I stated up entrance, a part of the enjoyable of dyeing your garments is seeing the ultimate end result. These 3 items turned out every thing from a lightweight grey to deep charcoal (I wouldn’t name any of them a “true black” colour). However this positively achieved my aim of constructing them much more wearable for me.
Extra Clothes & Material Tasks
Listed here are another tasks utilizing cloth, dye, or optimizing my wardrobe.
*This publish incorporates affiliate hyperlinks, so we could earn a small fee once you make a purchase order by way of hyperlinks on our website at no further price to you.